Effective Thermostat Troubleshooting Tips in Sterling
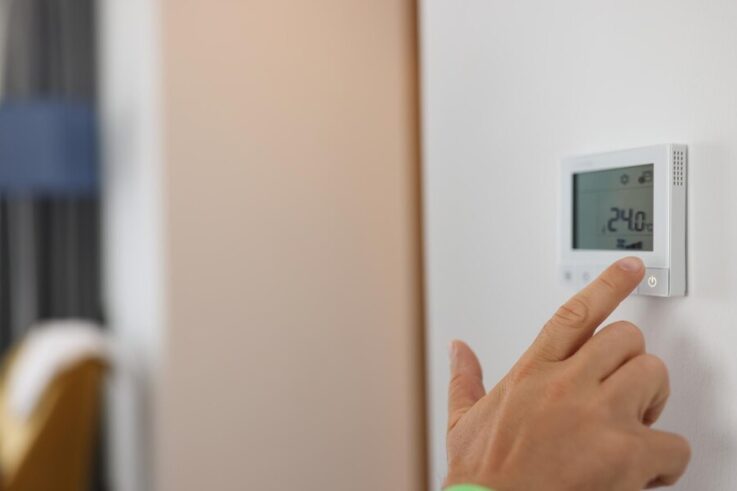
In the midst of a chilly Sterling winter, a malfunctioning thermostat can quickly turn comfort into frustration. To keep your home’s temperature just right, mastering thermostat troubleshooting is key. Whether you’re dealing with unresponsive controls, erratic temperature readings, or connectivity issues, knowing the right steps can save time and money. In this guide, we’ll dive into effective thermostat troubleshooting tips that empower you to diagnose and resolve common issues swiftly. Stay tuned to regain control over your home’s climate management effortlessly.
Common Thermostat Issues
Thermostats, while straightforward in design, can face a range of issues that impact their functionality and your home’s comfort. One common issue is unresponsiveness, where the thermostat fails to adjust temperatures despite user input. This can occur due to electrical faults such as loose connections, a tripped circuit breaker, or even a malfunctioning thermostat unit itself. Faulty wiring or internal component failure within the thermostat can also contribute to this problem, requiring troubleshooting to identify and rectify the root cause.
Another frustrating issue is erratic temperature readings, which can lead to your HVAC system operating inefficiently. Inaccurate sensor data may cause the system to cycle on and off unnecessarily, leading to uneven heating or cooling throughout your home. Additionally, battery-related issues can disrupt thermostat operations, causing sudden power loss or persistent low battery warnings. Regularly checking and replacing batteries can help maintain the thermostat’s reliability and prevent unexpected disruptions in climate control.
Signs Your Thermostat Needs Troubleshooting
Being attentive to signs that your thermostat needs troubleshooting can save you from discomfort and potential HVAC system issues. One significant indication is experiencing inconsistent room temperatures despite keeping the thermostat settings unchanged. This inconsistency often signals a problem with the thermostat’s sensors, which may be misreading the room temperature or failing to communicate effectively with the HVAC system.
Another red flag is frequent cycling of the HVAC system, where the thermostat turns on and off frequently without maintaining a steady temperature. This behavior not only disrupts comfort but also indicates that the thermostat may not be accurately regulating the HVAC system based on the desired temperature settings.
Tools You’ll Need for Troubleshooting
Before diving into thermostat troubleshooting, gather a few essential tools to streamline the process. Start with a small flat-head screwdriver to remove the thermostat cover and access its inner components. A voltage tester or multimeter is crucial for checking power supply and ensuring safety during diagnostics. Additionally, have a pencil and paper handy to jot down notes or document any changes you make.
Depending on your thermostat type, you might also need a new set of batteries or a smartphone for troubleshooting smart thermostats via apps or Wi-Fi connectivity checks. By having these tools prepared, you’ll be equipped to identify and resolve issues efficiently without unnecessary delays.
Step-by-Step Guide to Resetting Your Thermostat
Resetting your thermostat can often resolve minor glitches and restore its functionality. Start by turning off your HVAC system to prevent any electrical mishaps. Locate the reset button on your thermostat, typically found near the battery compartment or inside the cover. Press and hold the reset button for at least five seconds, then release it. Wait for a few minutes before turning your HVAC system back on.
This action will reset the thermostat to its default settings, clearing any temporary issues that may have caused malfunctions. If your thermostat doesn’t have a reset button, consult the manufacturer’s manual for alternative reset methods specific to your model. Following these steps ensures a systematic approach to resetting your thermostat and potentially resolving common operational problems swiftly.
Checking and Changing Batteries
Regularly checking and changing the batteries in your thermostat is essential for maintaining its functionality. Batteries power the thermostat’s operation, allowing it to communicate with your HVAC system and accurately control your home’s temperature. When batteries are low or dead, the thermostat may become unresponsive or display incorrect temperature readings, leading to discomfort and inefficiency.
To check the batteries, locate the battery compartment on your thermostat—this is usually accessible by gently removing the cover. Check the type of batteries required (typically AA or AAA) and inspect their condition. If the batteries are low, replace them with new ones of the same type. It’s recommended to change thermostat batteries at least once a year, ideally before the heating or cooling seasons begin, to ensure uninterrupted operation and accurate temperature control throughout the year.
Calibrating Temperature Sensors
Calibrating your thermostat’s temperature sensors ensures that it accurately reads and responds to the temperature in your home. Over time, sensors can become slightly off, leading to discrepancies in temperature readings and potentially causing your HVAC system to run inefficiently. Calibration involves adjusting the thermostat settings to match a known accurate temperature source, such as a digital thermometer.
To calibrate, first, verify the accuracy of your thermometer. Then, access your thermostat’s settings menu—consult your thermostat’s manual for specific instructions on calibration procedures. Typically, you’ll adjust the temperature offset settings to align with your verified thermometer readings. This process may involve small adjustments until the thermostat consistently displays accurate temperature readings. By calibrating your thermostat’s sensors, you can ensure your HVAC system operates efficiently, maintaining comfort while potentially reducing energy costs.
Verifying Power Supply and Connections
Ensuring a stable power supply and proper connections is crucial for your thermostat’s functionality. Start by checking if the thermostat is securely connected to its base and the base is firmly attached to the wall. Inspect the wiring for any signs of wear or damage, as faulty connections can lead to intermittent operation or complete failure. If your thermostat runs on batteries, replace them according to the manufacturer’s recommendations, as low battery levels can cause irregular operation. Additionally, verify that the circuit breaker or fuse controlling the thermostat’s power supply hasn’t tripped or blown.
Regularly cleaning the thermostat and its connections can prevent dust buildup, which may interfere with electrical contacts. By ensuring these connections are clean and secure, you can often resolve issues related to power supply and maintain reliable operation of your thermostat.
Troubleshooting Wi-Fi and Connectivity Problems
Wi-Fi connectivity issues can prevent your thermostat from remotely adjusting temperatures or receiving updates. Start by rebooting your Wi-Fi router and modem to refresh the connection. Ensure that your thermostat is within range of your Wi-Fi signal and isn’t obstructed by thick walls or interference from other devices. Check if the Wi-Fi credentials entered into the thermostat are correct and update them if necessary.
If the problem persists, consider resetting your thermostat’s Wi-Fi settings and reconnecting it to your network. Updating the thermostat’s firmware through its mobile app or website can also resolve compatibility issues with newer router protocols. If troubleshooting steps fail, consult your thermostat’s manual or contact customer support for further assistance in resolving Wi-Fi and connectivity problems effectively.
Addressing Unresponsive Controls
When faced with unresponsive controls on your thermostat, start by checking the power source. Ensure that the thermostat has power—replace batteries if needed or verify the electrical connection if it’s hardwired. Next, try resetting the thermostat by turning it off for a minute and then turning it back on. Sometimes, a simple reset can resolve communication issues between the thermostat and HVAC system. If the controls remain unresponsive, check for any physical obstructions around the thermostat that might be blocking buttons or switches.
Additionally, clean the thermostat’s interface and buttons to ensure dust or debris isn’t affecting their functionality. If these steps don’t restore control, consulting the manufacturer’s manual or contacting a professional technician can provide further guidance or repair options tailored to your thermostat model.
Dealing with Erratic Temperature Readings
Erratic temperature readings from your thermostat can lead to discomfort and inefficient heating or cooling. Start troubleshooting by verifying the thermostat’s location—it should be away from direct sunlight, drafts, or heat sources that could skew its readings. Next, check the thermostat’s temperature sensor for any dirt or dust accumulation, which can interfere with accurate readings. Calibration may be necessary if the thermostat allows adjustment of its temperature sensors.
Ensure that the thermostat is set to the correct mode (heating or cooling) and that the setpoint temperature reflects your comfort preferences. If erratic readings persist, consider upgrading to a smart thermostat, which often includes advanced features for more precise temperature control and monitoring. For persistent issues or if you’re unsure about troubleshooting steps, contacting a qualified HVAC technician ensures comprehensive diagnostics and potential resolution of temperature inconsistencies.
Consulting Professional Help When Needed
While many thermostat issues can be resolved with DIY troubleshooting, some problems may require professional assistance. If you’ve attempted basic troubleshooting steps like resetting the thermostat, checking batteries, and verifying connections without success, it might be time to call in a professional HVAC technician.
They have the expertise and specialized tools to diagnose complex electrical issues, repair or replace faulty components, and ensure your thermostat integrates seamlessly with your HVAC system. Professional help not only resolves immediate issues efficiently but also prevents potential damage to your heating and cooling systems.
Maintaining Your Thermostat for Long-Term Efficiency
Regular maintenance is crucial for maximizing the lifespan and efficiency of your thermostat. Start by cleaning the thermostat regularly to prevent dust buildup that can interfere with sensors and controls. Check and replace batteries annually, even if they appear functional, to avoid unexpected power failures. Periodically calibrate temperature sensors to ensure accurate readings and adjust settings as seasonal temperature changes occur.
Additionally, schedule professional HVAC maintenance at least once a year to inspect and tune your entire heating and cooling system, including the thermostat. By staying proactive with maintenance, you can enjoy reliable performance from your thermostat and optimal comfort in your home year-round.
Mastering thermostat troubleshooting empowers Sterling residents to maintain optimal home comfort effortlessly. By understanding common issues, utilizing effective troubleshooting techniques, and knowing when to seek professional assistance from experts like Cool Factory.
Ready to take control of your home’s climate? Contact Cool Factory today at 888-831-8797 for expert thermostat troubleshooting and HVAC solutions in Sterling. Whether you need immediate assistance or want to schedule a maintenance check-up, our team is here to ensure your thermostat operates efficiently and keeps your home comfortable in every season.


