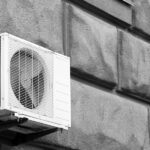

Process of Air Handler Installation at Home
Installing an air handler at home involves a meticulous process that ensures efficient cooling and heating throughout your space. From initial assessment to final installation, each step plays a crucial role in optimizing your HVAC system’s performance. Understanding the air handler installation process can empower homeowners to make informed decisions about their home comfort systems. In this blog, we delve into the essential stages of air handler installation, highlighting key considerations and benefits along the way. Whether you’re upgrading or installing new equipment, this guide offers valuable insights into achieving optimal indoor climate control.
Initial Assessment and Planning
Before embarking on an air handler installation project, conducting a thorough initial assessment and planning phase is crucial. This stage involves assessing your home’s current HVAC setup, identifying any inefficiencies or deficiencies in airflow and ventilation, and determining the optimal location for the air handler unit. A professional technician will typically evaluate factors such as the size of your home, existing ductwork condition, and specific cooling and heating needs. This assessment helps in selecting the right type and size of air handler that best fits your home’s requirements.
Moreover, planning encompasses logistical considerations like scheduling the installation at a convenient time and coordinating with HVAC professionals to ensure all necessary equipment and materials are prepared. Clear communication during this phase ensures that both homeowner expectations and technical requirements align seamlessly, laying the groundwork for a smooth installation process that minimizes disruption to daily routines.
Choosing the Right Air Handler Unit
Selecting the appropriate air handler unit is a critical decision that directly impacts the efficiency and effectiveness of your HVAC system. Factors such as the size of your home, climate conditions, and energy efficiency ratings play significant roles in this selection process. A professional assessment will help determine the correct capacity and specifications needed to adequately heat or cool your living space. Additionally, considerations for noise levels, air filtration capabilities, and compatibility with existing ductwork should also be taken into account to ensure optimal performance and comfort.
Homeowners can choose from various types of air handler units, including traditional air handlers, variable-speed units, and units with advanced features like humidity control. Consulting with HVAC experts allows for informed decisions based on your specific home requirements and long-term goals. Investing in the right air handler unit not only enhances indoor comfort but also contributes to energy savings and system longevity, making it a worthwhile investment in home comfort and efficiency.
Preparing Your Home for Installation
Before air handler installation begins, preparing your home adequately is crucial to ensure a smooth process and optimal performance of your HVAC system. Start by clearing the area where the air handler will be installed, removing any obstacles or clutter that could hinder the installation process. This includes ensuring access to the installation site is clear and unobstructed for technicians to work efficiently. Additionally, it’s essential to communicate any specific requirements or preferences to your installation team beforehand, such as preferred installation times or any unique considerations about your home’s layout.
Furthermore, consider the placement of the air handler within your home. It should be positioned strategically to facilitate proper airflow and accessibility for maintenance. Adequate space around the unit is necessary for airflow and future servicing needs. Taking these steps helps create an environment conducive to a successful installation and long-term efficiency of your HVAC system.
Understanding Installation Procedures
The installation of an air handler involves a series of systematic procedures designed to integrate the unit seamlessly into your home’s HVAC system. Technicians will typically begin by unpacking and inspecting the new unit to ensure all components are intact and in working order. Following this, they will proceed with mounting the air handler securely in the designated location, ensuring it is level and stable.
Next, technicians will connect the air handler to your existing ductwork or install new ducts if necessary. This step involves careful measurement and precision to ensure proper alignment and sealing to prevent air leaks. Electrical connections are then established, including wiring the unit to your home’s power supply and thermostat controls. Finally, thorough testing of the entire system is conducted to verify functionality and efficiency before handing over the newly installed air handler to you. Understanding these procedures can give you confidence in the installation process and help you appreciate the importance of professional expertise in achieving optimal HVAC performance.
Key Components of an Air Handler System
An air handler system comprises several essential components that work together to regulate indoor air quality and maintain comfortable temperatures. At its core, the air handler includes a blower, which circulates air through the ductwork and into various rooms of the house. This blower is typically powered by a motor and is responsible for pulling air from the return vents, passing it through filters to remove dust and allergens, and then pushing it back into the living spaces at the desired temperature.
Additionally, air handlers often incorporate heating and cooling elements, such as coils or heat exchangers. These components facilitate the exchange of heat between the air and the refrigerant, allowing for efficient temperature control throughout the year. The size and efficiency of these components play a crucial role in determining the overall effectiveness and energy efficiency of the HVAC system.
Ensuring Proper Ventilation and Airflow
Proper ventilation and airflow are critical aspects of air handler installation to ensure optimal indoor air quality and comfort. During installation, technicians carefully design and configure the ductwork to facilitate efficient airflow throughout the home. This involves calculating the correct duct size, positioning vents strategically, and minimizing bends or restrictions that could impede airflow.
Moreover, adequate ventilation is essential for maintaining healthy indoor air quality by ensuring sufficient fresh air circulation and reducing the buildup of pollutants. This may involve integrating air exchange systems or ensuring that the air handler is compatible with ventilation controls that regulate air intake and exhaust. By prioritizing proper ventilation and airflow during air handler installation, homeowners can enjoy improved comfort, energy efficiency, and better control over their indoor environment year-round.
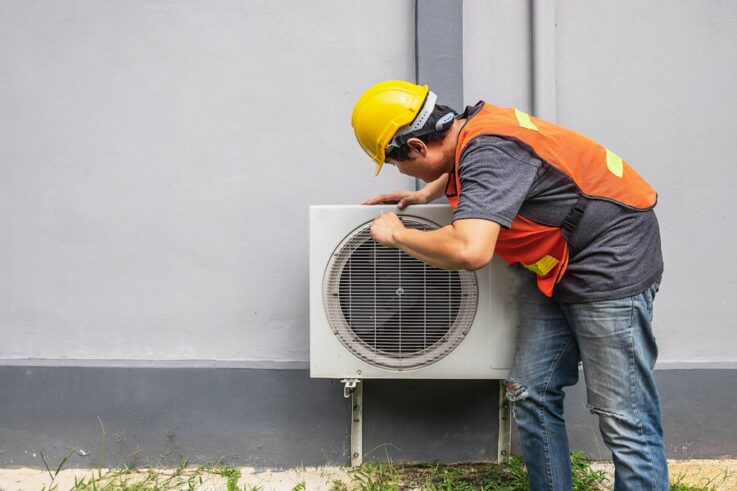
Safety Considerations During Installation
Safety is paramount during the installation of an air handler system to protect both installers and homeowners. Proper handling of electrical components is critical to prevent shocks or fires. Installers should follow manufacturer guidelines and use appropriate safety gear, such as gloves and goggles, when handling materials or tools.
Ensuring that the installation area is clear of obstacles reduces the risk of accidents during heavy lifting or maneuvering of equipment. Additionally, proper ventilation is essential to prevent exposure to dust or fumes that may arise during installation. By adhering to safety protocols and regulations, installers can ensure a secure and efficient air handler installation process that prioritizes the well-being of everyone involved.
Testing and Calibration of Equipment
After installation, thorough testing and calibration of the air handler equipment are necessary to verify its functionality and efficiency. This process involves checking electrical connections, verifying proper airflow, and calibrating temperature controls to ensure accurate operation. Installers may conduct performance tests to measure cooling and heating capacities, ensuring the system meets manufacturer specifications and homeowner expectations.
Calibration also includes adjusting settings for optimal energy efficiency, which can contribute to long-term cost savings and environmental benefits. By meticulously testing and calibrating the air handler system post-installation, homeowners can enjoy reliable indoor comfort tailored to their specific needs while maximizing the longevity and performance of their HVAC investment.
Benefits of Professional Installation Services
Opting for professional installation services for your air handler offers several significant advantages. Firstly, trained technicians bring expertise and experience to ensure proper setup and configuration. They can accurately assess your home’s specific needs, recommending the right unit size and placement for optimal efficiency and comfort. Professional installers also adhere to industry standards and manufacturer guidelines, minimizing the risk of installation errors that could compromise performance or warranty coverage.
Moreover, professional installations often include comprehensive testing and calibration processes. This ensures that your air handler operates at peak efficiency from the outset, reducing energy consumption and potentially lowering utility costs. Additionally, reputable HVAC companies typically offer post-installation support and service warranties, providing peace of mind knowing that any issues will be promptly addressed by trained professionals.
Maintenance Tips for Long-Term Performance
To maintain the long-term performance of your air handler, regular maintenance is essential. Start by regularly replacing air filters according to manufacturer recommendations, typically every one to three months. This helps maintain proper airflow and prevents strain on the system. Additionally, schedule annual professional inspections to check for any potential issues, clean internal components, and ensure all parts are functioning correctly.
Keep the area around the air handler clean and free from obstructions to promote adequate airflow. Regularly inspect the ductwork for leaks or damage, as these can affect efficiency. Finally, monitor the thermostat settings to ensure they’re optimized for both comfort and energy savings. By following these maintenance tips, you can extend the lifespan of your air handler and enjoy consistent performance throughout its usage.
Understanding the process of air handler installation at home empowers homeowners to make informed decisions about their HVAC systems. From initial planning and professional installation to ongoing maintenance, each step plays a crucial role in ensuring efficient cooling and heating. Choosing the right unit and maintaining it properly can enhance comfort while potentially lowering energy costs.
At Cool Factory, we specialize in seamless air handler installations, backed by expert knowledge and top-notch service. Contact us at 888-831-8797 to learn more about how our team can help you achieve optimal indoor climate control. Take the first step towards a more comfortable home today!